LED Screen Power Supply Failure Diagnosis
Learn how to diagnose LED screen power supply faults, voltage drop, overloaded 5V rails, loose terminals, cabinet power branches, and flicker caused by unstable power.
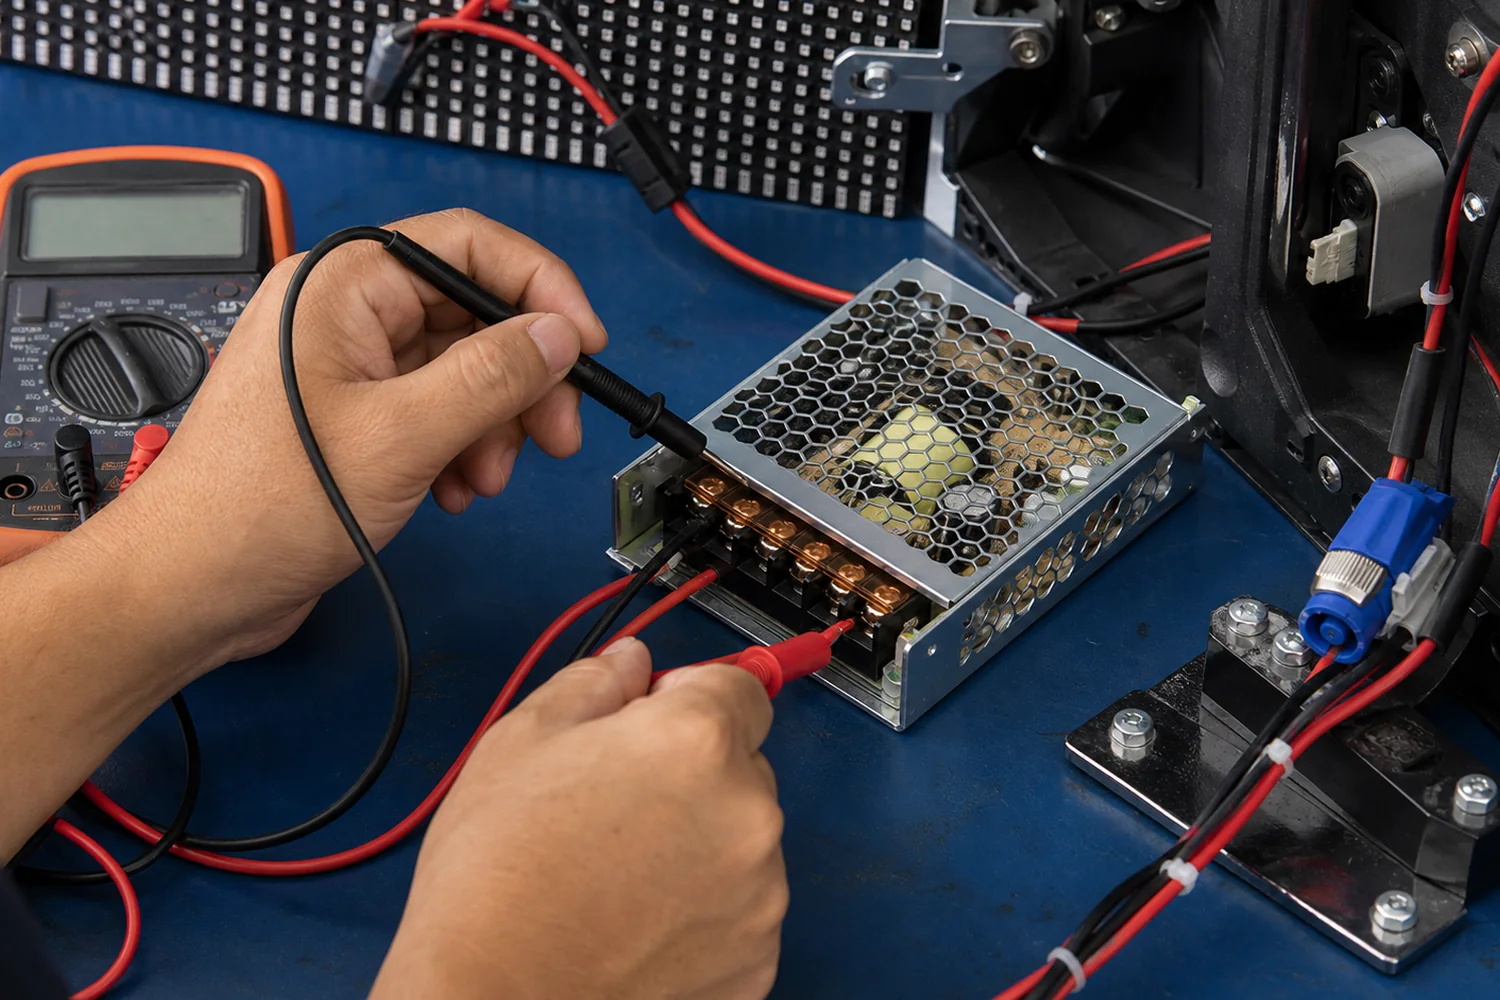
Power Fault Diagnostic Workflow
LED Screen Power Supply Failure Diagnosis
Power supply faults are one of the most common causes of black modules, flicker, color instability, rebooting receiving cards, and intermittent LED screen failures. This guide explains how to diagnose the power system safely and logically.
1. Recognize Power-Related Symptoms
A power fault does not always produce a completely black screen. It can also create unstable behavior that looks like a signal or module problem. Start by matching the visual symptom to the likely power path.
| Screen symptom | Possible power cause | First measurement |
|---|---|---|
| One cabinet is black | No AC input, failed 5V power supply, blown fuse | AC input and 5V DC output |
| Modules flicker on full white | Voltage drop or overloaded supply | 5V output under high brightness |
| Receiving card keeps rebooting | Unstable 5V rail or loose connector | Voltage at receiving-card input |
| Only part of cabinet is dark | Bad DC cable, terminal, or distribution branch | Voltage at module input connector |
| Power supply is hot or noisy | Overload, aging capacitor, blocked ventilation | Load current and temperature |
2. Safety First: Isolate AC and DC Checks
LED display cabinets often contain high-voltage AC input and low-voltage DC output. Do not probe blindly inside a live cabinet. Confirm the wiring diagram, use insulated probes, keep one hand away from the cabinet when possible, and avoid touching exposed AC terminals. If you are not trained for AC-side diagnosis, limit your work to safe DC-side checks and replace the complete power unit.
3. Measure the 5V Output Under Load
Many LED modules use 5V switching power supplies. Measure directly at the power supply output and then again at the receiving card or module input. The difference between these readings tells you whether the problem is inside the supply or caused by cable/connector voltage drop.
Good diagnostic practice
- Test black, red, green, blue, and full white patterns
- Measure at both PSU output and module input
- Check voltage while the fault is visible
- Compare with a known-good cabinet
Do not ignore
- Loose screws on terminal blocks
- Oxidized aviation connectors
- Undersized DC cables
- Water marks or white corrosion near terminals
4. Check Load and Power Budget
If a cabinet works at low brightness but fails at high brightness, the total LED load may exceed the power supply capacity or the supply may have aged. Estimate the number of modules connected to each supply and compare with the rated current. For rental cabinets, also check whether modules were mixed from different batches or replaced with higher-consumption versions.
| Test | Healthy result | Problem indication |
|---|---|---|
| No-load output | Stable rated DC voltage | No output or unstable output |
| Full-white load | Voltage remains stable | Voltage drops, flicker appears, card reboots |
| Connector temperature | Warm at most | Hot terminal, discoloration, melted plastic |
| Branch comparison | Similar voltage on all branches | One branch lower than the others |
| Swap test | Fault stays with cabinet wiring | Fault follows the power supply |
5. Diagnose Connectors, Cables, and Distribution
A good switching power supply can still produce a dark module if the DC branch is open. Inspect the output terminal, DC cable, connector pin, module power socket, and cabinet distribution board. Pull gently on suspect wires and look for heat marks, corrosion, loose screws, or cracked solder joints.
6. When to Replace the Power Supply
Replace the unit if it has no stable output, drops heavily under a normal load, trips protection repeatedly, shows visible swelling or burn marks, has a strong odor, or creates repeatable flicker that follows the supply during a swap test. For field repair, replacing the whole PSU is usually safer and faster than component-level repair.
Recommended Tools
- Digital multimeter
- Clamp meter for load current
- Known-good 5V switching power supply
- Insulated screwdriver
- Spare DC power cables and terminal blocks
- LED test pattern source
- Thermal camera or infrared thermometer
- Contact cleaner and cleaning brush
FAQ
Can a power supply fault look like a signal problem?
Yes. Low or unstable 5V can make receiving cards reboot, create random flicker, or cause only part of the screen to disappear.
Should I repair the internal PSU circuit?
For most LED screen service work, complete power supply replacement is safer, faster, and more reliable unless you have qualified bench-level PSU repair experience.
What test pattern is best for power diagnosis?
Full white at the intended operating brightness is the most useful stress test because it creates the highest current draw across the modules.